In the world of diabetes management, understanding how to check blood sugar using a glucometer is essential. This blog rephrases key insights from reliable sources like the American Diabetes Association and Mayo Clinic into a short, concise question-answer format. We’ll cover everything from blood sugar testing basics to advanced glucose meter tips, incorporating LSI keywords like blood glucose levels, finger prick techniques, and hypoglycemia management. Whether you’re new to self-monitoring blood glucose or seeking to refine your routine, this guide aims to empower you with practical knowledge. Let’s dive into the Q&A sections for clarity and ease.
Blood Sugar Testing Essentials: What Is a Glucometer and Why Use It?
Q: What exactly is a glucometer in diabetes care?
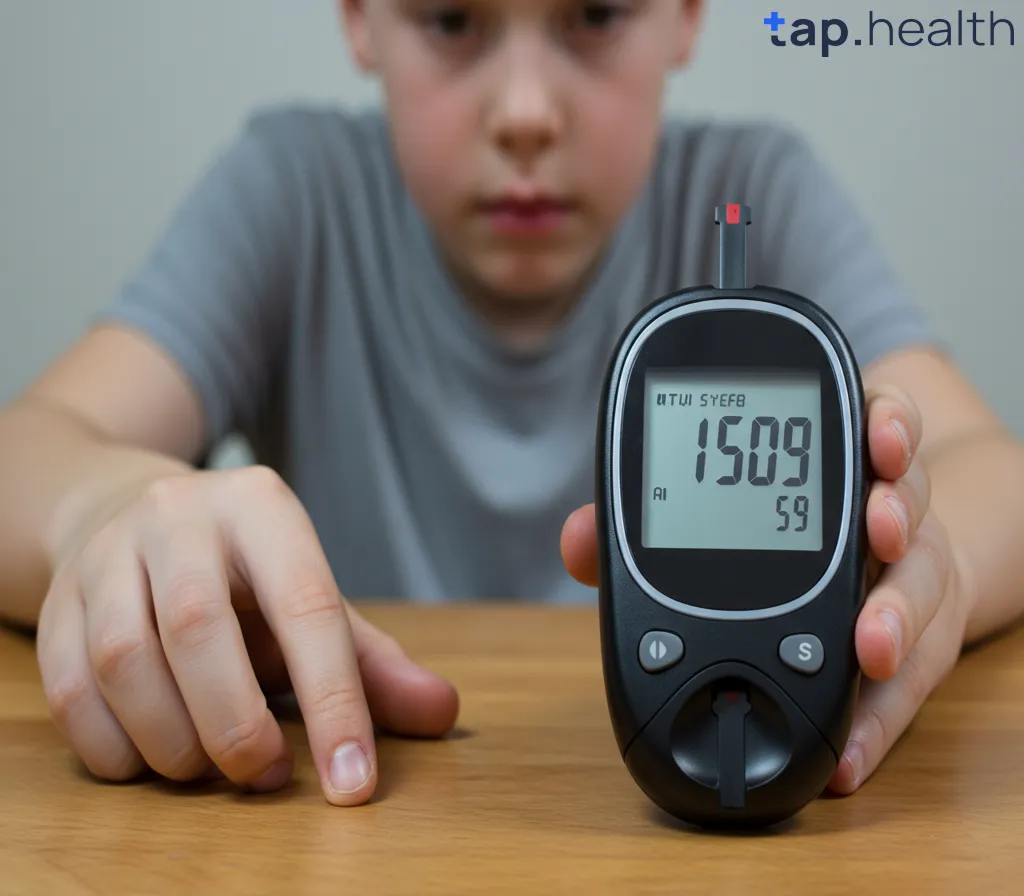
A: A glucometer, also known as a blood glucose meter or sugar monitor, is a portable electronic device that measures glucose levels in your blood using a small drop from your fingertip. It provides instant readings to help manage diabetes by tracking how food, exercise, or medication impacts your blood glucose levels.
Q: Why is regular blood glucose monitoring important?
A: Regular checks prevent complications like nerve damage, kidney issues, or heart problems in type 1 and type 2 diabetes. It’s also vital for gestational diabetes screening, prediabetes detection, or monitoring symptoms of high or low blood sugar, ensuring proactive health decisions.
Q: Who should perform home blood sugar checks?
A: Anyone with diabetes, pregnant individuals at risk for gestational diabetes, those with prediabetes symptoms, or under medical supervision. It’s a key tool for maintaining optimal blood glucose control and avoiding emergencies.
Preparing for Glucose Meter Usage: Supplies and Setup
Q: What supplies are needed for accurate blood sugar testing at home?
A: Essential items include the glucometer (brands like Accu-Chek or FreeStyle), compatible test strips, a lancet device with disposable lancets, alcohol wipes or soap for cleaning, gauze for wiping, and a logbook or app for recording results.
Q: How do test strips work in blood glucose monitoring?
A: Test strips are chemically coated plastic inserts that react with blood glucose. Insert one into the meter; it absorbs the blood drop and displays the reading. Always use brand-specific strips to avoid errors.
Q: What’s the role of a lancet in finger prick blood tests?
A: Lancets are tiny needles in a pricking device that puncture the skin to draw a blood drop. Use a fresh one each time to minimize pain, infection risk, and ensure hygienic diabetes self-testing.
Q: How should I store glucometer supplies for longevity?
A: Keep test strips in their sealed container at room temperature, away from humidity or extreme temperatures. Store the meter in a cool, dry spot, and lancets in a clean area. Avoid refrigerating unless specified.
Step-by-Step Finger Prick Techniques: How to Use a Glucometer Properly
Q: What’s the first step in checking blood sugar levels with a meter?
A: Wash your hands thoroughly with warm soap and water for 20 seconds to remove residue that could skew results. Dry completely, or use an alcohol wipe if washing isn’t possible.
Q: How do I prepare the glucometer for a blood glucose test?
A: Turn on the device (it often activates upon inserting a test strip). Push the strip fully into the slot until it clicks, and wait for the ready symbol, like a blood drop icon.
Q: How to load and set a lancet device for minimal pain?
A: Insert a new lancet, set the depth dial to medium (around 3), and cap it. Adjust lower for less pain or higher if insufficient blood flows during the finger stick procedure.
Q: Where’s the best spot for a finger prick in blood sugar monitoring?
A: Choose the side of your fingertip for better blood flow and less discomfort. Rotate fingers to prevent soreness; avoid thumbs, index fingers, or repetitive spots.
Q: How do I perform the actual finger prick safely?
A: Press the lancet device against the fingertip side and trigger it. It feels like a quick pinch. Allow a round blood drop to form without excessive squeezing.
Q: How to apply blood to the test strip accurately?
A: Touch the strip’s edge to the blood drop; it absorbs automatically. Watch the meter’s countdown—typically 5-20 seconds—without wiping the first drop unless hands are unclean.
Q: What happens after applying blood in a glucose test?
A: The meter beeps and displays your blood sugar level in mg/dL (e.g., 110). Record it with time, meal context, and notes for pattern tracking in diabetes management.
Q: How to clean up after a home blood glucose check?
A: Dispose of the used strip in trash and lancet in a sharps container. Never discard needles loosely to prevent injury or infection.
Interpreting Blood Glucose Levels: What Do the Numbers Mean?
Q: What are normal blood sugar ranges for diabetes control?
A: Per American Diabetes Association, fasting or pre-meal: 80-130 mg/dL; 1-2 hours post-meal: under 180 mg/dL. These targets help maintain healthy glucose levels.
Q: What if my blood sugar reading is too high?
A: 180-250 mg/dL: Hydrate and review recent intake. Over 250: Monitor symptoms like thirst; check ketones if type 1. Above 300: Contact a doctor for hyperglycemia management.
Q: How to handle low blood sugar during monitoring?
A: Below 70 mg/dL indicates hypoglycemia. Treat with 15g fast carbs (juice, glucose tablets), recheck in 15 minutes, and watch for symptoms like shaking or dizziness.
Q: How often should I check blood glucose based on diabetes type?
A: Type 1: 4-10 times daily (meals, bedtime). Type 2 on insulin: 2-4 times. Type 2 without insulin: 1- few times weekly. Gestational: 4 times (fasting + post-meals). Follow doctor’s advice.
Avoiding Common Mistakes in Self-Monitoring Blood Glucose
Q: What mistakes lead to inaccurate glucometer readings?
A: Skipping hand washing (causes false highs from residue), using expired/wet strips, squeezing fingers too hard, ignoring temperature effects, or mismatched coding on older meters.
Q: How can extreme temperatures affect glucose meter accuracy?
A: Heat or cold damages strips and devices; avoid testing in cars or outdoors. Store at room temperature for reliable blood sugar checks.
Q: Why avoid reusing lancets in finger prick tests?
A: Dull needles increase pain and infection risk. Always use fresh ones for safe, comfortable diabetes testing routines.
Q: What if the blood drop is too small for the test strip?
A: Warm hands, hang arm down, or gently massage to improve flow. Don’t force it, as it dilutes the sample and skews results.
Pain Reduction and Alternative Methods in Glucose Testing
Q: How to make finger pricks less painful for regular monitoring?
A: Prick fingertip sides, use fresh lancets, adjust depth low, warm/rub hands, or let arm dangle for better circulation in blood glucose checks.
Q: What is alternative site testing (AST) for blood sugar?
A: Test on palm, forearm, thigh, or calf for less pain. However, it’s slower for detecting changes; not ideal post-meal or during suspected lows. Check meter manual.
Q: How do continuous glucose monitors (CGMs) compare to glucometers?
A: CGMs use arm sensors for automatic 5-minute readings with trends/alarms; glucometers require manual pricks. CGMs are pricier but complement finger sticks for confirmation.
Maintenance, Troubleshooting, and Advanced Tips for Diabetes Management
Q: How to calibrate and maintain a blood glucose meter?
A: Use control solution periodically to verify accuracy. Clean with damp cloth, replace batteries, and code if required on older models for precise readings.
Q: When should I replace my glucometer?
A: After 3-5 years, or if error-prone, damaged, or outdated. Newer ones offer faster results, app integration, and smaller blood needs.
Q: Can glucometers be shared safely?
A: Share the meter but not lancets, devices, or strips to prevent infections like hepatitis. Each user needs personal supplies.
Q: What to do if my meter shows an error message?
A: Common fixes: Reinsert strip for E-1/E-2, treat lows for “Lo,” seek help for “Hi,” add blood for insufficient sample, or replace expired strips.
Q: How to track blood sugar results effectively?
A: Log in notebooks, apps (e.g., MySugr), or meter memory with details like time, meals, meds, exercise. Share with doctors for pattern analysis.
Q: Tips for traveling with glucometer supplies?
A: Pack extras in carry-on, include doctor’s note for needles, use cool bags in extremes, and inform TSA. Test as needed during trips.
Q: Are there myths about blood glucose monitoring I should know?
A: Myths include hospital machines being infallible (home ones are accurate within 15%), always wiping first drop (only if unclean), or reusing strips (impossible for accuracy).
Q: Real-user tips for easier glucometer use?
A: Keep supplies in a pouch, test consistently, use apps for sharing, warm hands pre-prick. Millions manage daily—practice makes it routine.
Wrapping Up: Empower Your Health with Proper Blood Sugar Checks
Mastering how to check blood sugar using a glucometer transforms diabetes care from daunting to doable. By following these Q&As, you’ll achieve accurate monitoring, better control, and fewer complications. Remember, consult your doctor for personalized advice. Stay proactive—you’ve got this!
If you or someone you love has diabetes, checking blood sugar is likely part of daily life.
And the tool most people use? A glucometer—a small device that tells you how much sugar (glucose) is in your blood using just a tiny drop.
But if you’ve never done it before, it can feel confusing or even scary.
What if you do it wrong? What if the number is too high or too low?
In this guide, we’ll walk you through exactly how to check blood sugar using a glucometer, step by step.
No confusing medical terms. No robotic language. Just clear, simple instructions—like a friend showing you how to do it.
We’ve researched everything from the American Diabetes Association, Mayo Clinic, CDC, and NHS to make sure every tip is safe and accurate.
What Is a Glucometer?
A glucometer (also called a glucose meter or blood sugar monitor) is a small electronic device that measures how much glucose is in your blood.
You only need a tiny drop of blood, usually from your fingertip, and within seconds, the meter gives you a number—your blood sugar level.
This number helps you:
- Know if your sugar is too high or too low
- Decide if you need insulin or food
- See how food, exercise, or medicine affects your levels
- Stay healthy and avoid problems
Why Should You Check Your Blood Sugar?
Checking your blood sugar isn’t just for people with type 1 or type 2 diabetes.
You might need to test if:
- You have symptoms of high or low sugar
- You’re pregnant and being checked for gestational diabetes
- You’re in the hospital
- Your doctor wants to screen you for prediabetes
For people with diabetes, regular testing helps prevent serious problems like:
- Nerve damage
- Vision loss
- Kidney disease
- Heart attacks
Think of your glucometer as your personal health helper. It gives you real-time info so you can make smart choices.
What You Need to Check Blood Sugar
Before you start, make sure you have all the right supplies.
1. Glucometer
The main device. Comes in many brands (like OneTouch, Accu-Chek, FreeStyle).
2. Test Strips
Small plastic strips that go into the meter. They’re coated with chemicals that react with your blood.
Important: Each meter uses specific strips. Don’t mix brands.
3. Lancet Device (Pricker)
A small pen-like tool that holds a tiny needle (called a lancet) to prick your skin.
4. Lancets
The disposable needles that go inside the pricker. Use a new one each time for less pain and infection risk.
5. Alcohol Wipe or Soap and Water
To clean your finger before testing.
6. Gauze or Tissue
To wipe away the blood after testing.
7. Logbook or App
To write down your results. Some meters connect to apps that track your numbers automatically.
Step-by-Step: How to Check Blood Sugar Using Glucometer
Follow these 8 simple steps to test your blood sugar safely and correctly.
Step 1: Wash Your Hands
Why?
Dirt, food, or sugar on your hands can mess up the test and give a false high reading.
How?
- Use warm water and soap.
- Scrub for at least 20 seconds.
- Dry well, especially your fingertips.
Tip: If you can’t wash your hands, use an alcohol wipe and let your finger dry completely before pricking.
Step 2: Prepare the Meter and Strip
Turn on the meter.
Most meters turn on when you insert a test strip.
Insert the test strip.
Push it into the slot until it clicks. Make sure it’s fully in.
Wait for the meter to say it’s ready.
It will usually show a blood drop symbol or flash.
Step 3: Load the Lancet Device
Take a new lancet from the pack.
Screw it into the pricking device.
Set the depth.
Most devices have a dial (1 to 5). Start with a medium setting (3). If it hurts, go lower. If no blood comes out, go higher.
Cap the device until ready to use.
Step 4: Choose Your Prick Spot
Most people prick the side of the fingertip, not the center.
Why the side?
- Less pain
- More blood flow
- Fingertips heal fast
You can use different fingers each time to avoid sore spots.
Avoid:
- Thumbs (you use them a lot)
- Index fingers (more sensitive)
- The same spot every time
Step 5: Prick Your Finger
Hold the lancet device firmly against the side of your fingertip.
Press the button.
It stings for a second—like a quick pinch.
Don’t squeeze hard yet.
Let the blood form a nice round drop.
Step 6: Apply the Blood to the Strip
Bring the test strip to the blood drop.
Touch the edge of the strip to the blood.
The strip will soak it up automatically.
You’ll see a countdown on the meter.
Don’t wipe the first drop away.
Unlike in hospitals, at home you usually use the first drop unless your hands aren’t clean.
Step 7: Wait for the Result
The meter will beep or vibrate in 5–20 seconds.
Your blood sugar level will appear on the screen in mg/dL (milligrams per deciliter).
Example: 110 mg/dL
Step 8: Record and Clean Up
Write down your result.
Include:
- The number
- Time of day
- Before or after meals
- Any notes (like if you just exercised)
Use a notebook, app, or meter with memory.
Dispose of the strip and lancet safely.
- Put the lancet in a sharps container (a hard plastic bottle with a lid).
- Throw the strip in the trash.
Never throw loose needles in the trash.
What Do the Numbers Mean?
Now that you have your result, what does it mean?
Here are the general targets (based on American Diabetes Association guidelines):
| Fasting (before breakfast) | 80–130 mg/dL |
| Before meals (lunch/dinner) | 80–130 mg/dL |
| 1–2 hours after meals | Below 180 mg/dL |
What If Your Number Is Too High?
- 180–250 mg/dL: Mild high—drink water, check if you ate something sugary
- Over 250 mg/dL: High—check for symptoms (thirst, tiredness, blurry vision). If you have type 1, check for ketones.
- Over 300 mg/dL: Call your doctor
What If Your Number Is Too Low?
- Below 70 mg/dL: Low blood sugar (hypoglycemia)
- Symptoms: Shaking, sweating, dizziness, hunger, fast heartbeat
- Treat with 15g of fast sugar: 4 oz juice, 3–4 glucose tablets, 1 tbsp honey
- Recheck in 15 minutes
Common Mistakes When Using a Glucometer
Even small errors can give wrong results.
1. Not Washing Hands
Sugar from food (like orange juice) can stick to your fingers and make your reading too high.
2. Using Expired or Wet Test Strips
Strips can go bad. Always check the expiration date and keep them in their sealed container.
3. Squeezing the Finger Too Hard
This can mix tissue fluid with blood and mess up the result.
4. Not Coding the Meter (if needed)
Some older meters need to be “coded” to match the strip batch. Newer ones are auto-coded.
5. Testing in Extreme Temperatures
Don’t use your meter in very hot or cold places (like a car in summer). Heat and cold can damage strips and the device.
6. Using the Wrong Blood Drop
If the drop is too small, the meter may give an error or wrong number.
How Often Should You Check Your Blood Sugar?
It depends on your health.
Type 1 Diabetes
- 4–10 times a day
- Before meals, after meals, bedtime, sometimes overnight
Type 2 Diabetes (on insulin)
- 2–4 times a day
- Fasting and after meals
Type 2 Diabetes (not on insulin)
- Once a day or a few times a week
- To see patterns
Gestational Diabetes
- 4 times a day: Fasting + 1 hour after each meal
Your doctor will tell you how often to test.
Tips for Less Pain When Pricking
Nobody likes finger pricks. Here’s how to make it easier.
1. Use the Side of the Finger
Less sensitive than the tip.
2. Use a Fresh Lancet Every Time
Old needles get dull and hurt more.
3. Adjust the Depth Setting
Lower number = less pain. Find your sweet spot.
4. Let Your Arm Hang Down
This increases blood flow to your fingers.
5. Warm Your Hands
Run them under warm water or rub them together.
6. Don’t Reuse Lancets
It’s unsafe and more painful.
Alternative Site Testing (AST)
Some meters let you test on other spots:
- Palm
- Forearm
- Upper arm
- Thigh
- Calf
Pros:
- Less painful
- Easier to reach
Cons:
- Slightly slower to show changes (not good for checking lows after insulin)
- Not recommended when you feel low or after meals
Always check your meter’s manual to see if it allows AST.
How to Store Your Supplies
Keep your gear working longer with proper storage.
Test Strips:
- Keep in their original container
- Store at room temperature (not in the bathroom or car)
- Close the lid tightly
- Don’t refrigerate (unless the label says to)
Meter:
- Keep in a cool, dry place
- Avoid extreme heat or cold
- Clean with a damp cloth (never dip in water)
Lancets:
- Store in a clean, dry place
- Never leave them out in the open
How to Calibrate and Maintain Your Meter
Most modern meters don’t need manual calibration.
But here’s how to keep your meter accurate:
1. Check the Code (if needed)
Some older meters need a code that matches the test strip batch. Enter it when you open a new box.
2. Run a Control Test
Every once in a while, use a control solution (liquid with known glucose level) to test your meter and strips.
If the result matches the range on the bottle, your system is working.
3. Clean the Meter
Wipe with a soft, damp cloth. Don’t use alcohol or cleaners.
4. Update Batteries
Replace when the low-battery symbol shows.
When to Replace Your Meter
Most meters last 3–5 years.
Replace yours if:
- It gives error messages often
- Results don’t match how you feel
- It’s damaged or dropped in water
- It’s outdated and no longer supported
Newer meters are faster, need less blood, and connect to apps.
Can You Share a Glucometer?
No.
You can share the meter, but never share:
- Lancet device
- Lancets
- Test strips
These touch blood and can spread infections like hepatitis or HIV.
Each person should have their own testing kit.
What If You Get an Error Message?
Don’t panic. Common errors and fixes:
| E-1 or E2 | General error | Reinsert strip, try new one |
| Lo | Blood sugar too low to read | Test again, treat low sugar |
| Hi | Blood sugar too high to read | May need medical help |
| Blood | Not enough blood | Add more drop or start over |
| Strip | Bad or wrong strip | Use a new strip, check expiration |
Check your meter’s manual for exact meanings.
How to Track Your Results
Writing down your numbers helps you and your doctor see patterns.
Use:
- A notebook with dates, times, and results
- A printable log sheet (available online)
- A smartphone app (like Glucose Buddy, MySugr)
- A meter with built-in memory
What to Track:
- Blood sugar number
- Time of day
- Before or after meals
- Medication or insulin dose
- Food eaten
- Exercise
- How you feel
Bring your log to every doctor visit.
Continuous Glucose Monitors (CGMs) vs. Glucometers
You may have heard of CGMs (like Dexcom or Freestyle Libre).
How are they different?
| How it works | Finger prick | Small sensor on arm |
| Frequency | Manual (you decide) | Automatic (every 5 mins) |
| Shows trends | No | Yes (arrows up/down) |
| Alarms for highs/lows | No | Yes |
| Cost | Lower | Higher (but often covered) |
CGMs don’t replace glucometers completely.
You still need to confirm with a fingerstick when:
- You feel low but CGM says normal
- The number seems wrong
- You’re making treatment decisions
How to Travel with Your Glucometer
Flying? Road trip? Here’s how to stay safe.
Pack:
- Extra test strips and lancets
- Extra batteries
- Control solution
- Sharps container
- Doctor’s note (if carrying needles)
TSA Tips:
- Keep meter and supplies in your carry-on
- You can bring insulin, syringes, and lancets
- Inform security if you need to test during the flight
In Hot/Cold Places:
- Don’t leave supplies in the car
- Keep them in a cool bag if needed
Myths About Glucometers
Let’s clear up common misunderstandings.
Myth 1: “The hospital machine is always right.”
Not true. Home meters are accurate within 10–15%. Small differences are normal.
Myth 2: “You must wipe away the first drop of blood.”
Only if your hands aren’t clean. Otherwise, the first drop is fine.
Myth 3: “All meters are the same.”
No. They differ in size, blood amount needed, speed, and features.
Myth 4: “You can reuse test strips.”
No. Each strip is for one use only.
Myth 5: “If the number is weird, it’s broken.”
Not always. Check for errors like low battery or expired strips first.
Real-Life Tips from People Who Use Glucometers
Here’s what real users say helps:
- “I keep my meter and strips in a small pouch so I always know where they are.”
- “I test at the same times every day so I can compare.”
- “I use the app to track my sugar and share it with my doctor.”
- “I warm my hands under running water—it makes pricking way easier.”
You’re not alone. Millions use glucometers every day.
Summary: How to Check Blood Sugar Using Glucometer
Checking your blood sugar doesn’t have to be hard.
Just follow these simple steps:
- Wash your hands
- Turn on the meter and insert a strip
- Load the lancet device
- Prick the side of your fingertip
- Apply the blood drop to the strip
- Wait for the result
- Record the number
- Clean up safely
With practice, it becomes quick and easy.
Your glucometer is a powerful tool. It helps you stay in control, avoid emergencies, and live a healthier life.
Frequently Asked Questions (FAQ) on How to Check Blood Sugar Using Glucometer – Step-by-Step Guide
Q: How do I know if my glucometer is accurate?
Test it with control solution. Compare results to the range on the bottle. If it’s close, it’s working.
Q: Can I use someone else’s glucometer?
You can use the same meter, but never share lancets, lancing device, or strips.
Q: Do I have to test on my finger?
Most meters require a finger. Some allow alternate sites (arm, thigh), but not for detecting lows.
Q: How much blood do I need?
Just a tiny drop—about the size of a small bead. Most meters need 0.3 to 1 microliter.
Q: What if I don’t get enough blood?
Let your arm hang down, warm your hands, or gently massage your finger. Don’t squeeze hard.
Q: Can I reuse a test strip?
No. Each strip is for one use only. Reusing gives wrong results.
Q: Should I code my meter?
Only if it’s an older model. Most new meters are auto-coded.
Q: How often should I check my meter’s accuracy?
Every time you open a new box of strips, or if you think it’s giving wrong results.
Q: Can I test in the dark?
Yes, most meters have backlit screens.
Q: What if my meter says “HI” or “LO”?
“HI” means your sugar is very high (over 600 mg/dL). “LO” means very low (under 20 mg/dL). Act based on symptoms and call your doctor if needed.
Q: Can I recycle test strip containers?
Yes, most are #1 or #2 plastic. Check local rules.
Q: Do glucometers need Wi-Fi?
No, but some connect to apps via Bluetooth.
Q: How long do test strips last?
Usually 1–2 years. Check the expiration date. Once opened, use within 3–6 months.
Q: Can I test after eating fruit?
Yes, but wait 1–2 hours to see the full effect.
Q: Is it safe to test during pregnancy?
Yes. It’s essential for managing gestational diabetes.
Q: Can I donate unused supplies?
Some charities accept unopened, unexpired supplies. Check with groups like Insulin for Life.
Q: What if I drop my meter?
Check for damage. Test with control solution to make sure it still works.
Q: Can I use hand sanitizer instead of washing?
Only if no water is available. Let your finger dry completely before testing.